앱의 시작시점에 무언가를 해주기 위해서라면 아래의 init() 에 포함시켜 주면 된다. 하지만 앱이 종료되는 시점에 무언가를 해야 하거나 앱의 디테일한 상태 시점에 따라서 무언가를 해줘야 할 때는 어떻게 할까?
import SwiftUI

@main
struct SampleApp: App {

    init() {
        print("app start")
    }

    var body: some Scene {
        WindowGroup {
            ContentView()
        }
    }
}
AppDelegate, SceneDelegate
갑자기 SwiftUI 에서 무슨 Delegate 냐 하는데... 알아두면 유용한 친구들이다... 후에 구조체나 클래스가 자신의 일부 책임을 다른 타입의 인스턴스에게 위임하는 Delegate 패턴에 대해서 알아보도록 하겠다. 오늘은 사용방법만!!
AppDelegate 파일 생성하기
우선 나는 Sample 이라는 프로젝트를 만들었다. 그리고 AppDelegate.swift 파일을 만들어준다.
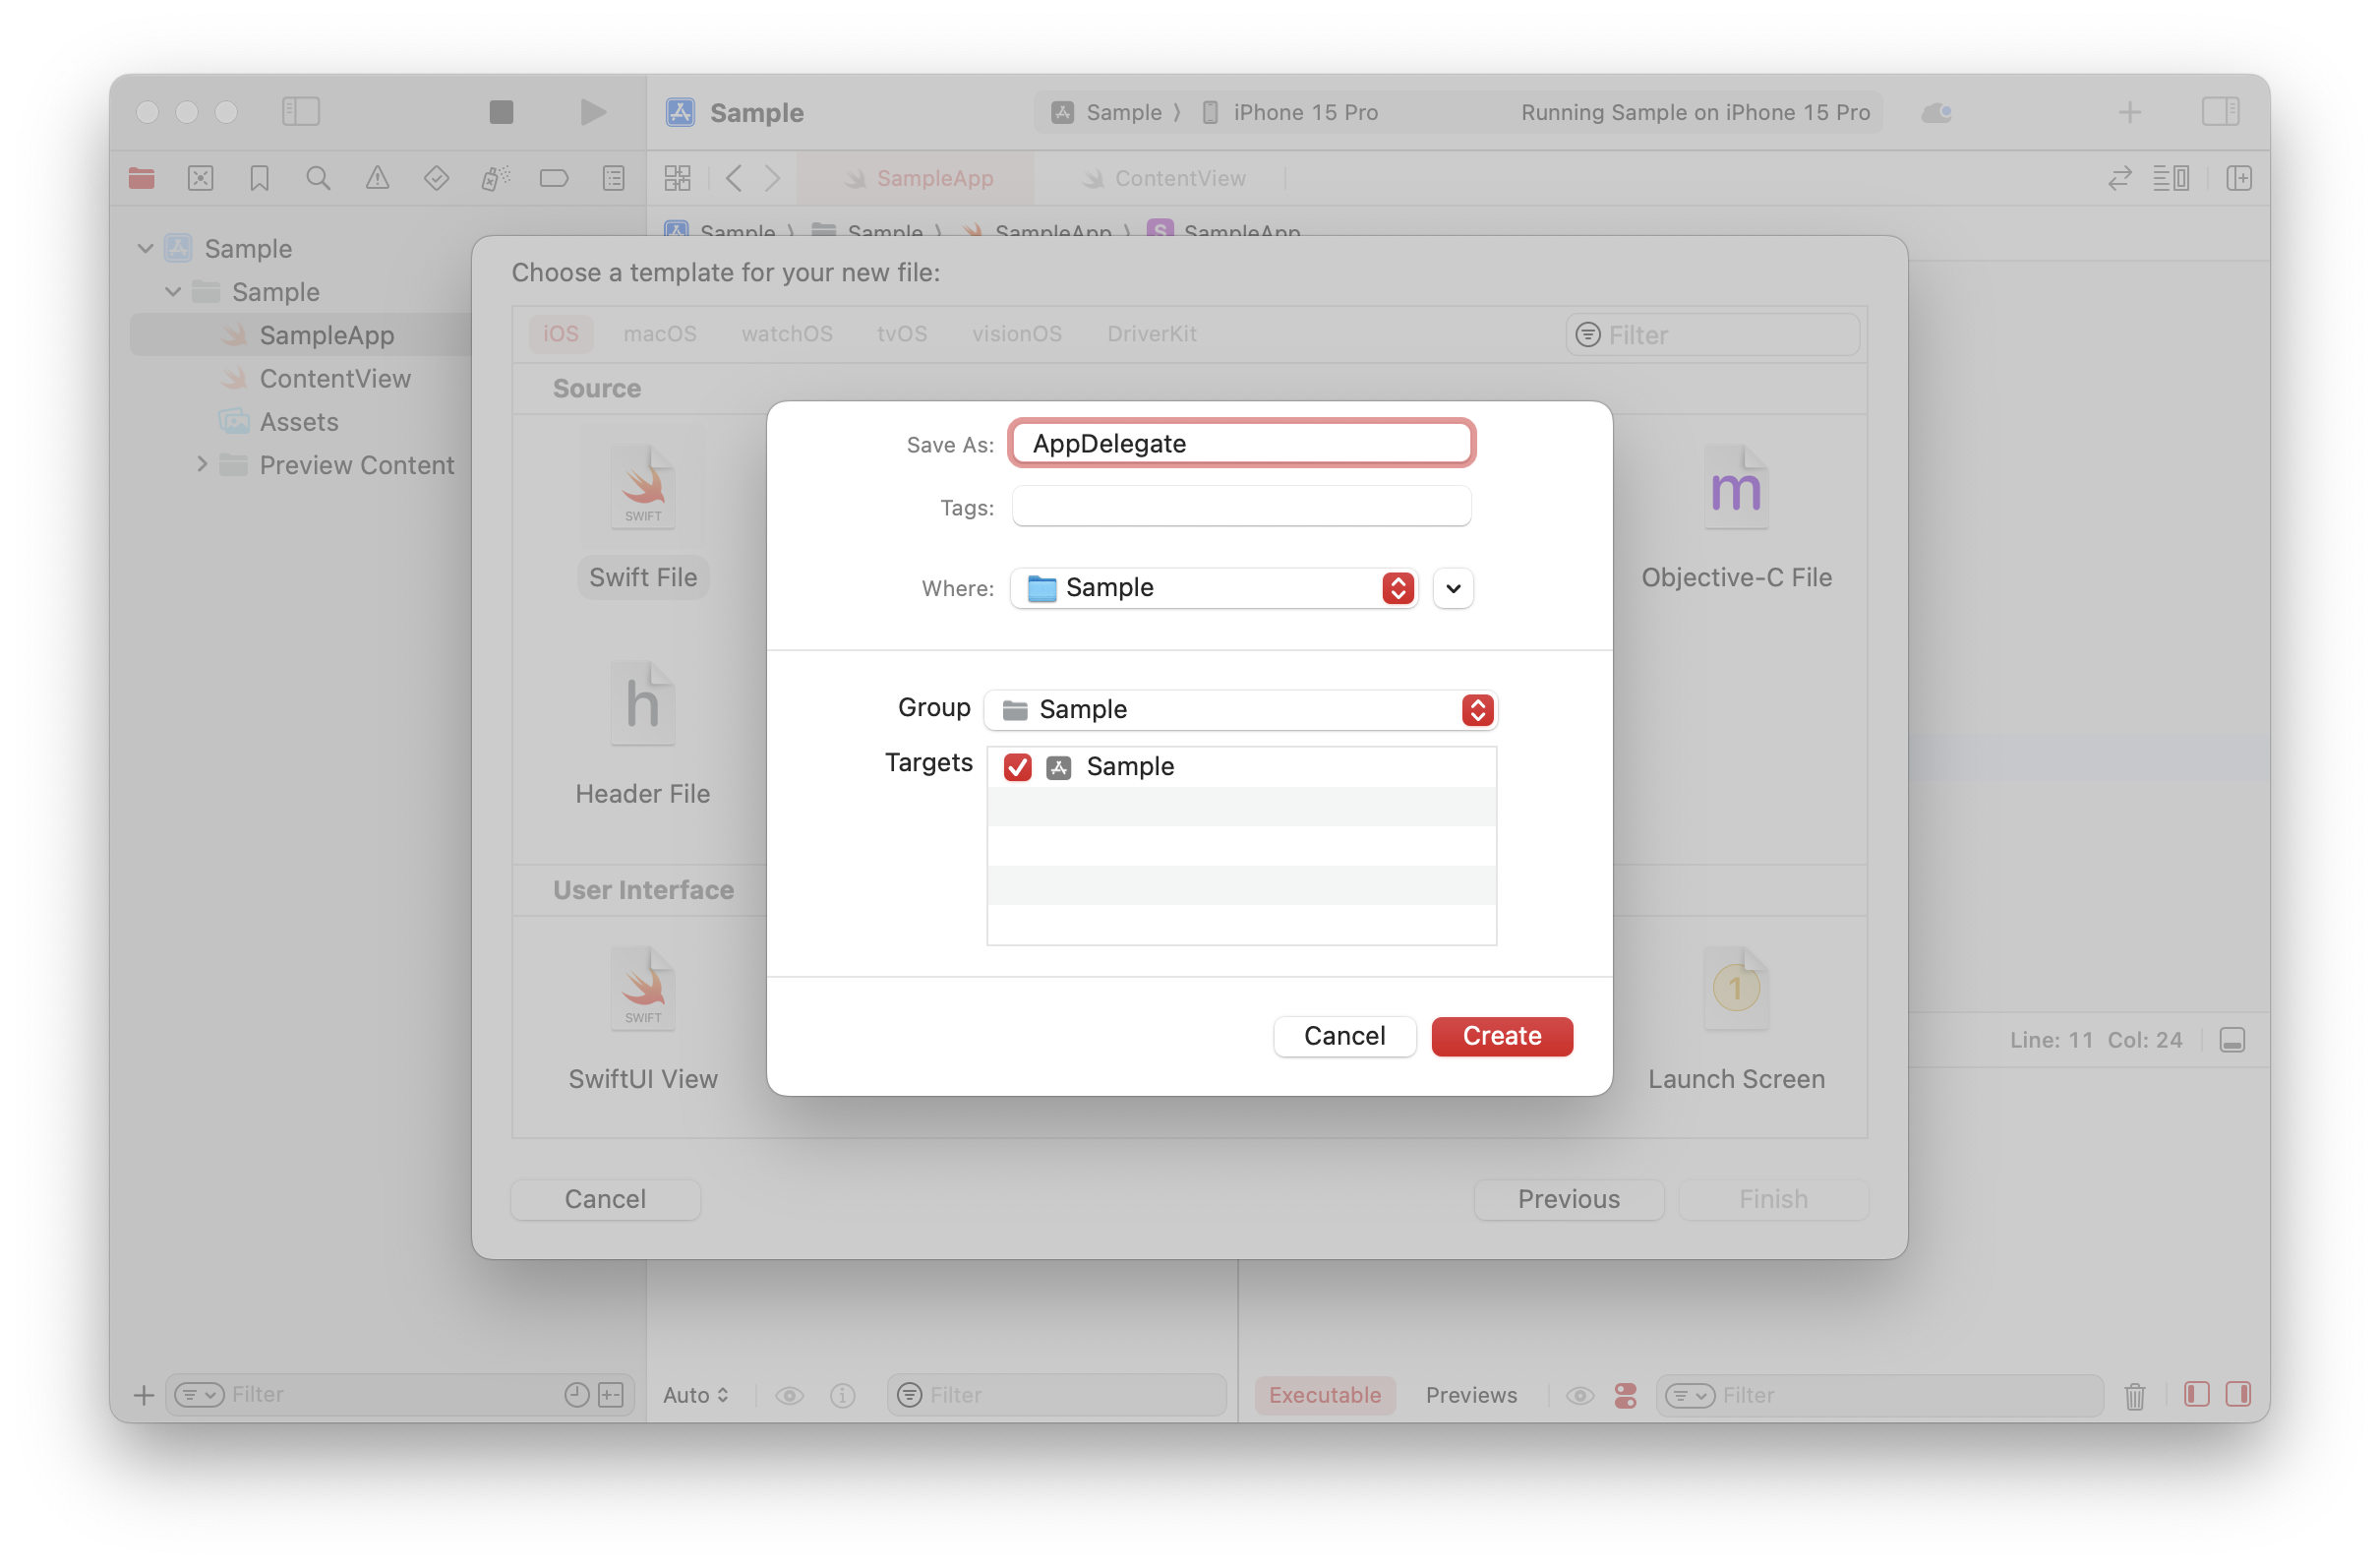
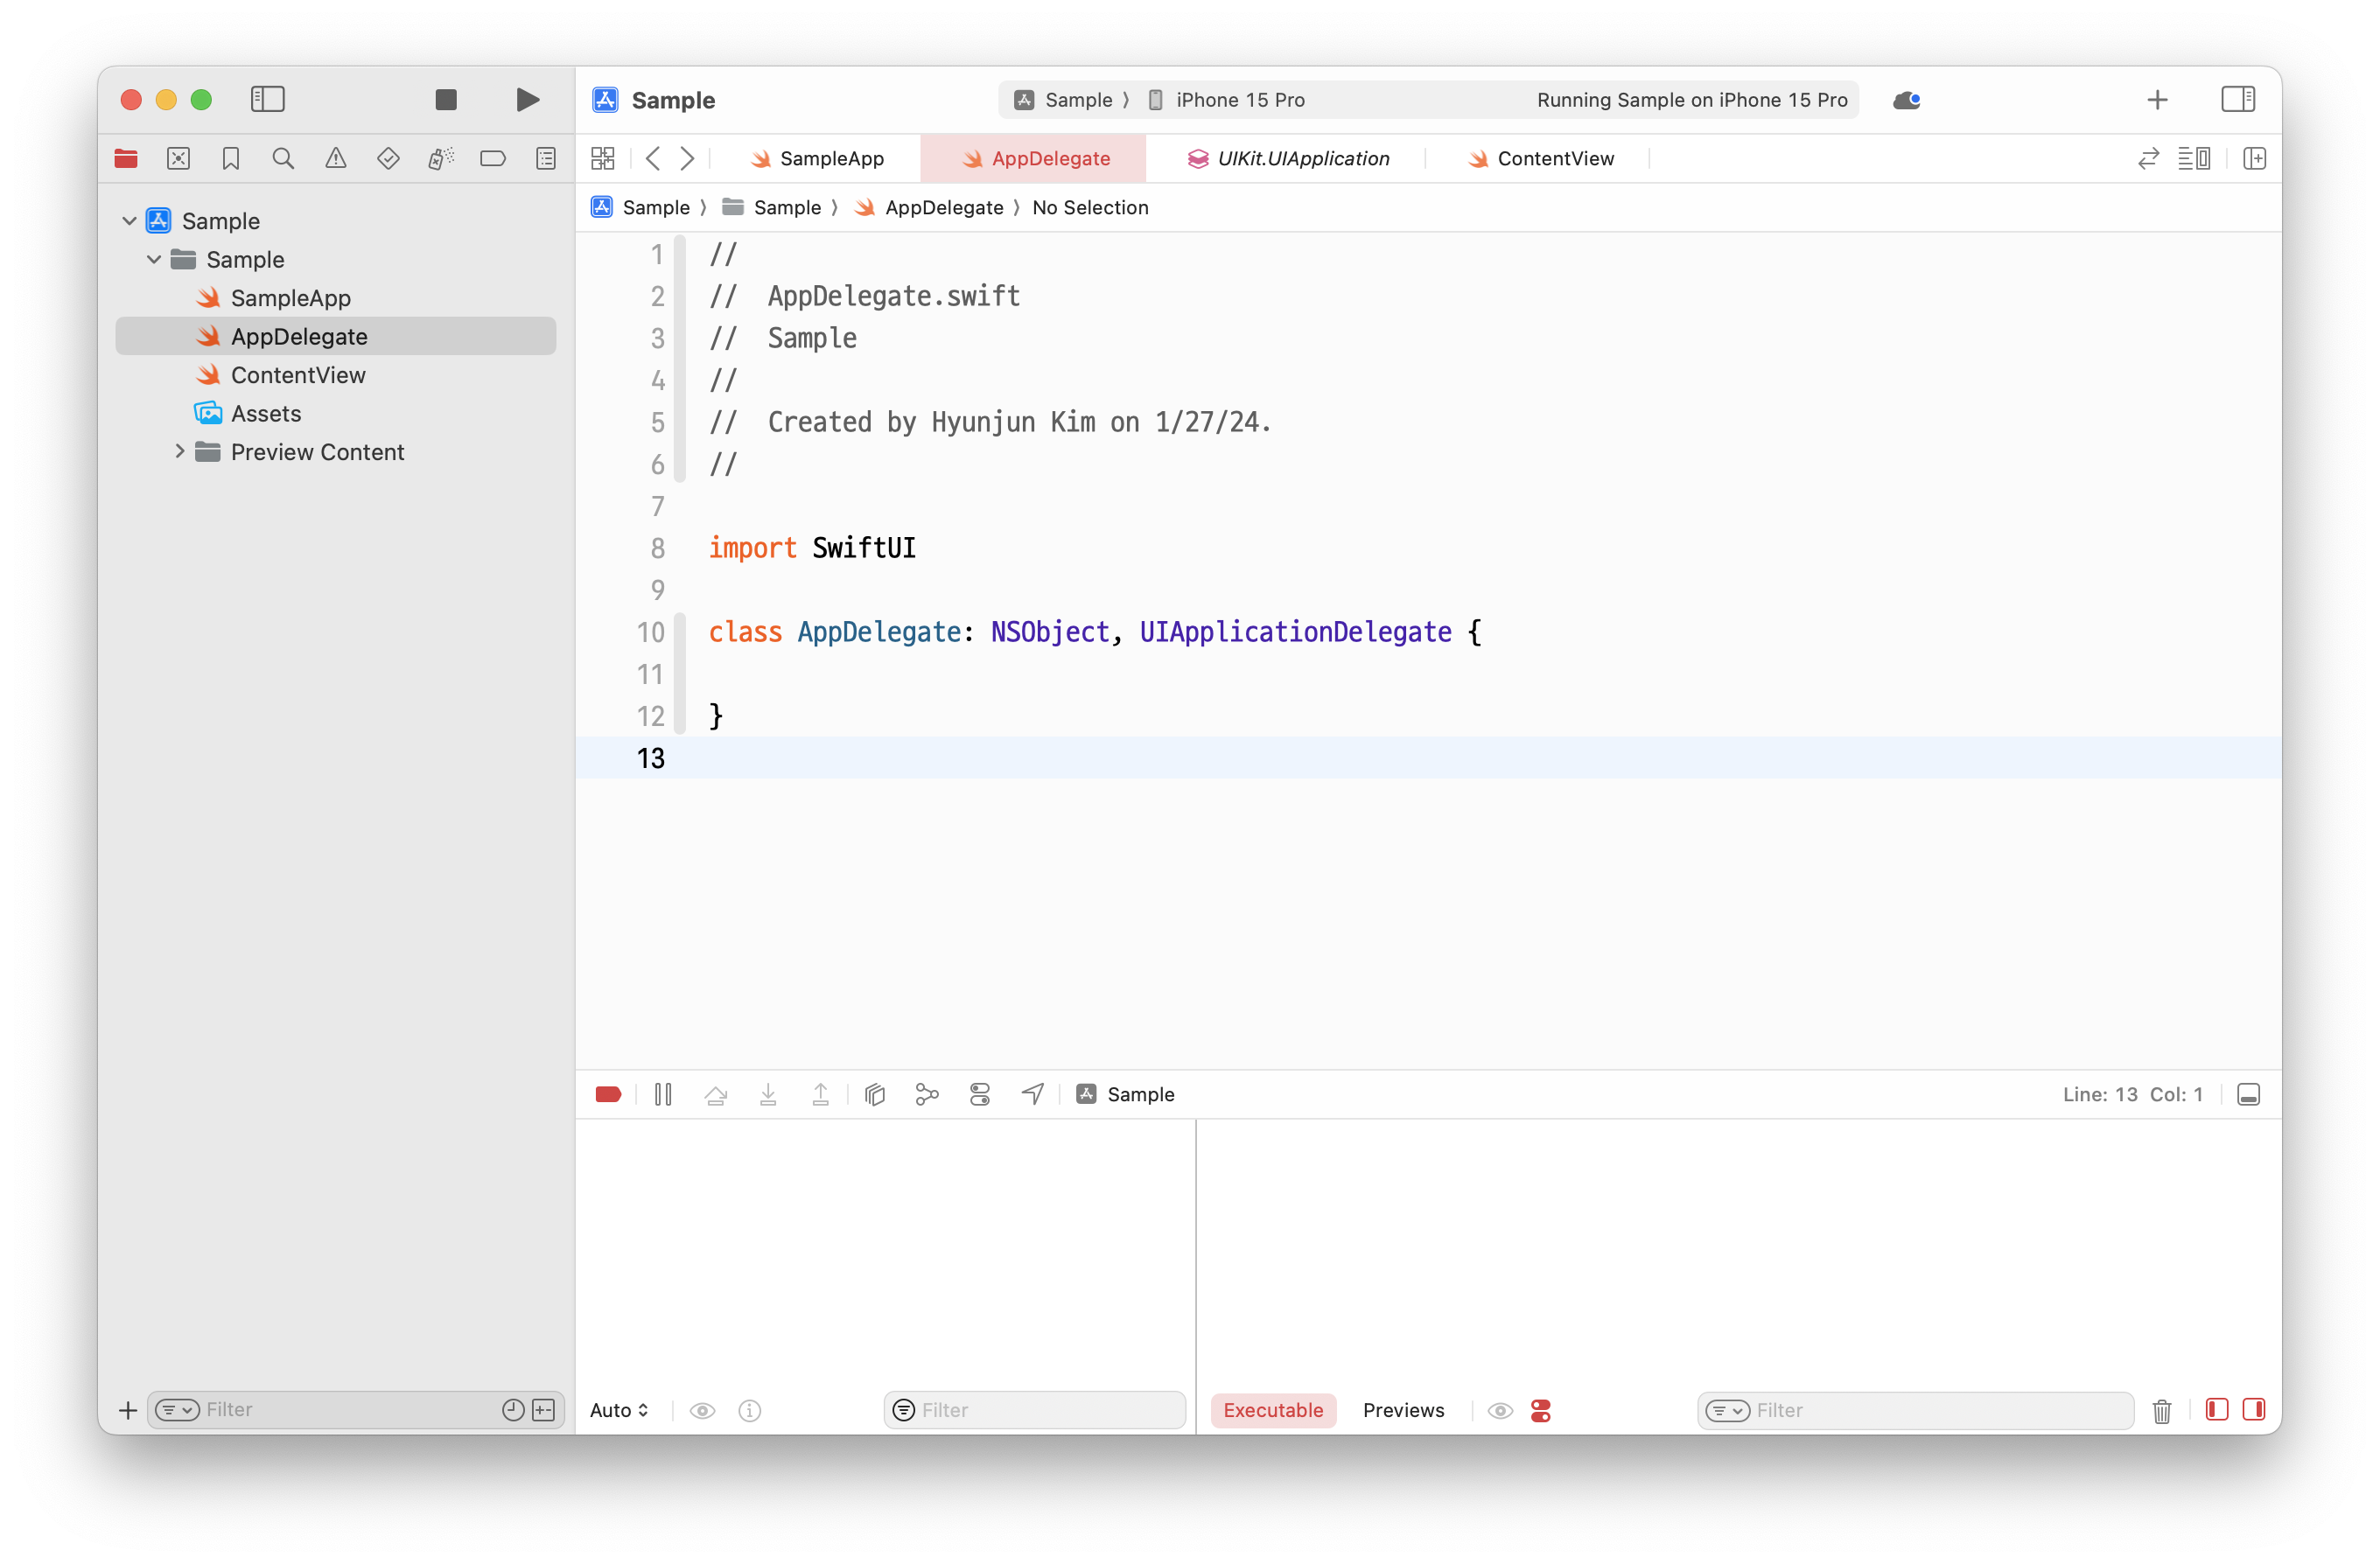
그리고 아래와 같이 간단하게 코드를 쳐본다. 여기서 주의 깊게 볼 것은 UIApplicationDelegate 인데 command + 클릭 을 통해 한번 봐보자.
import SwiftUI

class AppDelegate: NSObject, UIApplicationDelegate {

}
... 여러 가지 함수들이 나온다. 모든 함수가 optional 이라 꼭 들어가야 하는 함수는 없다.
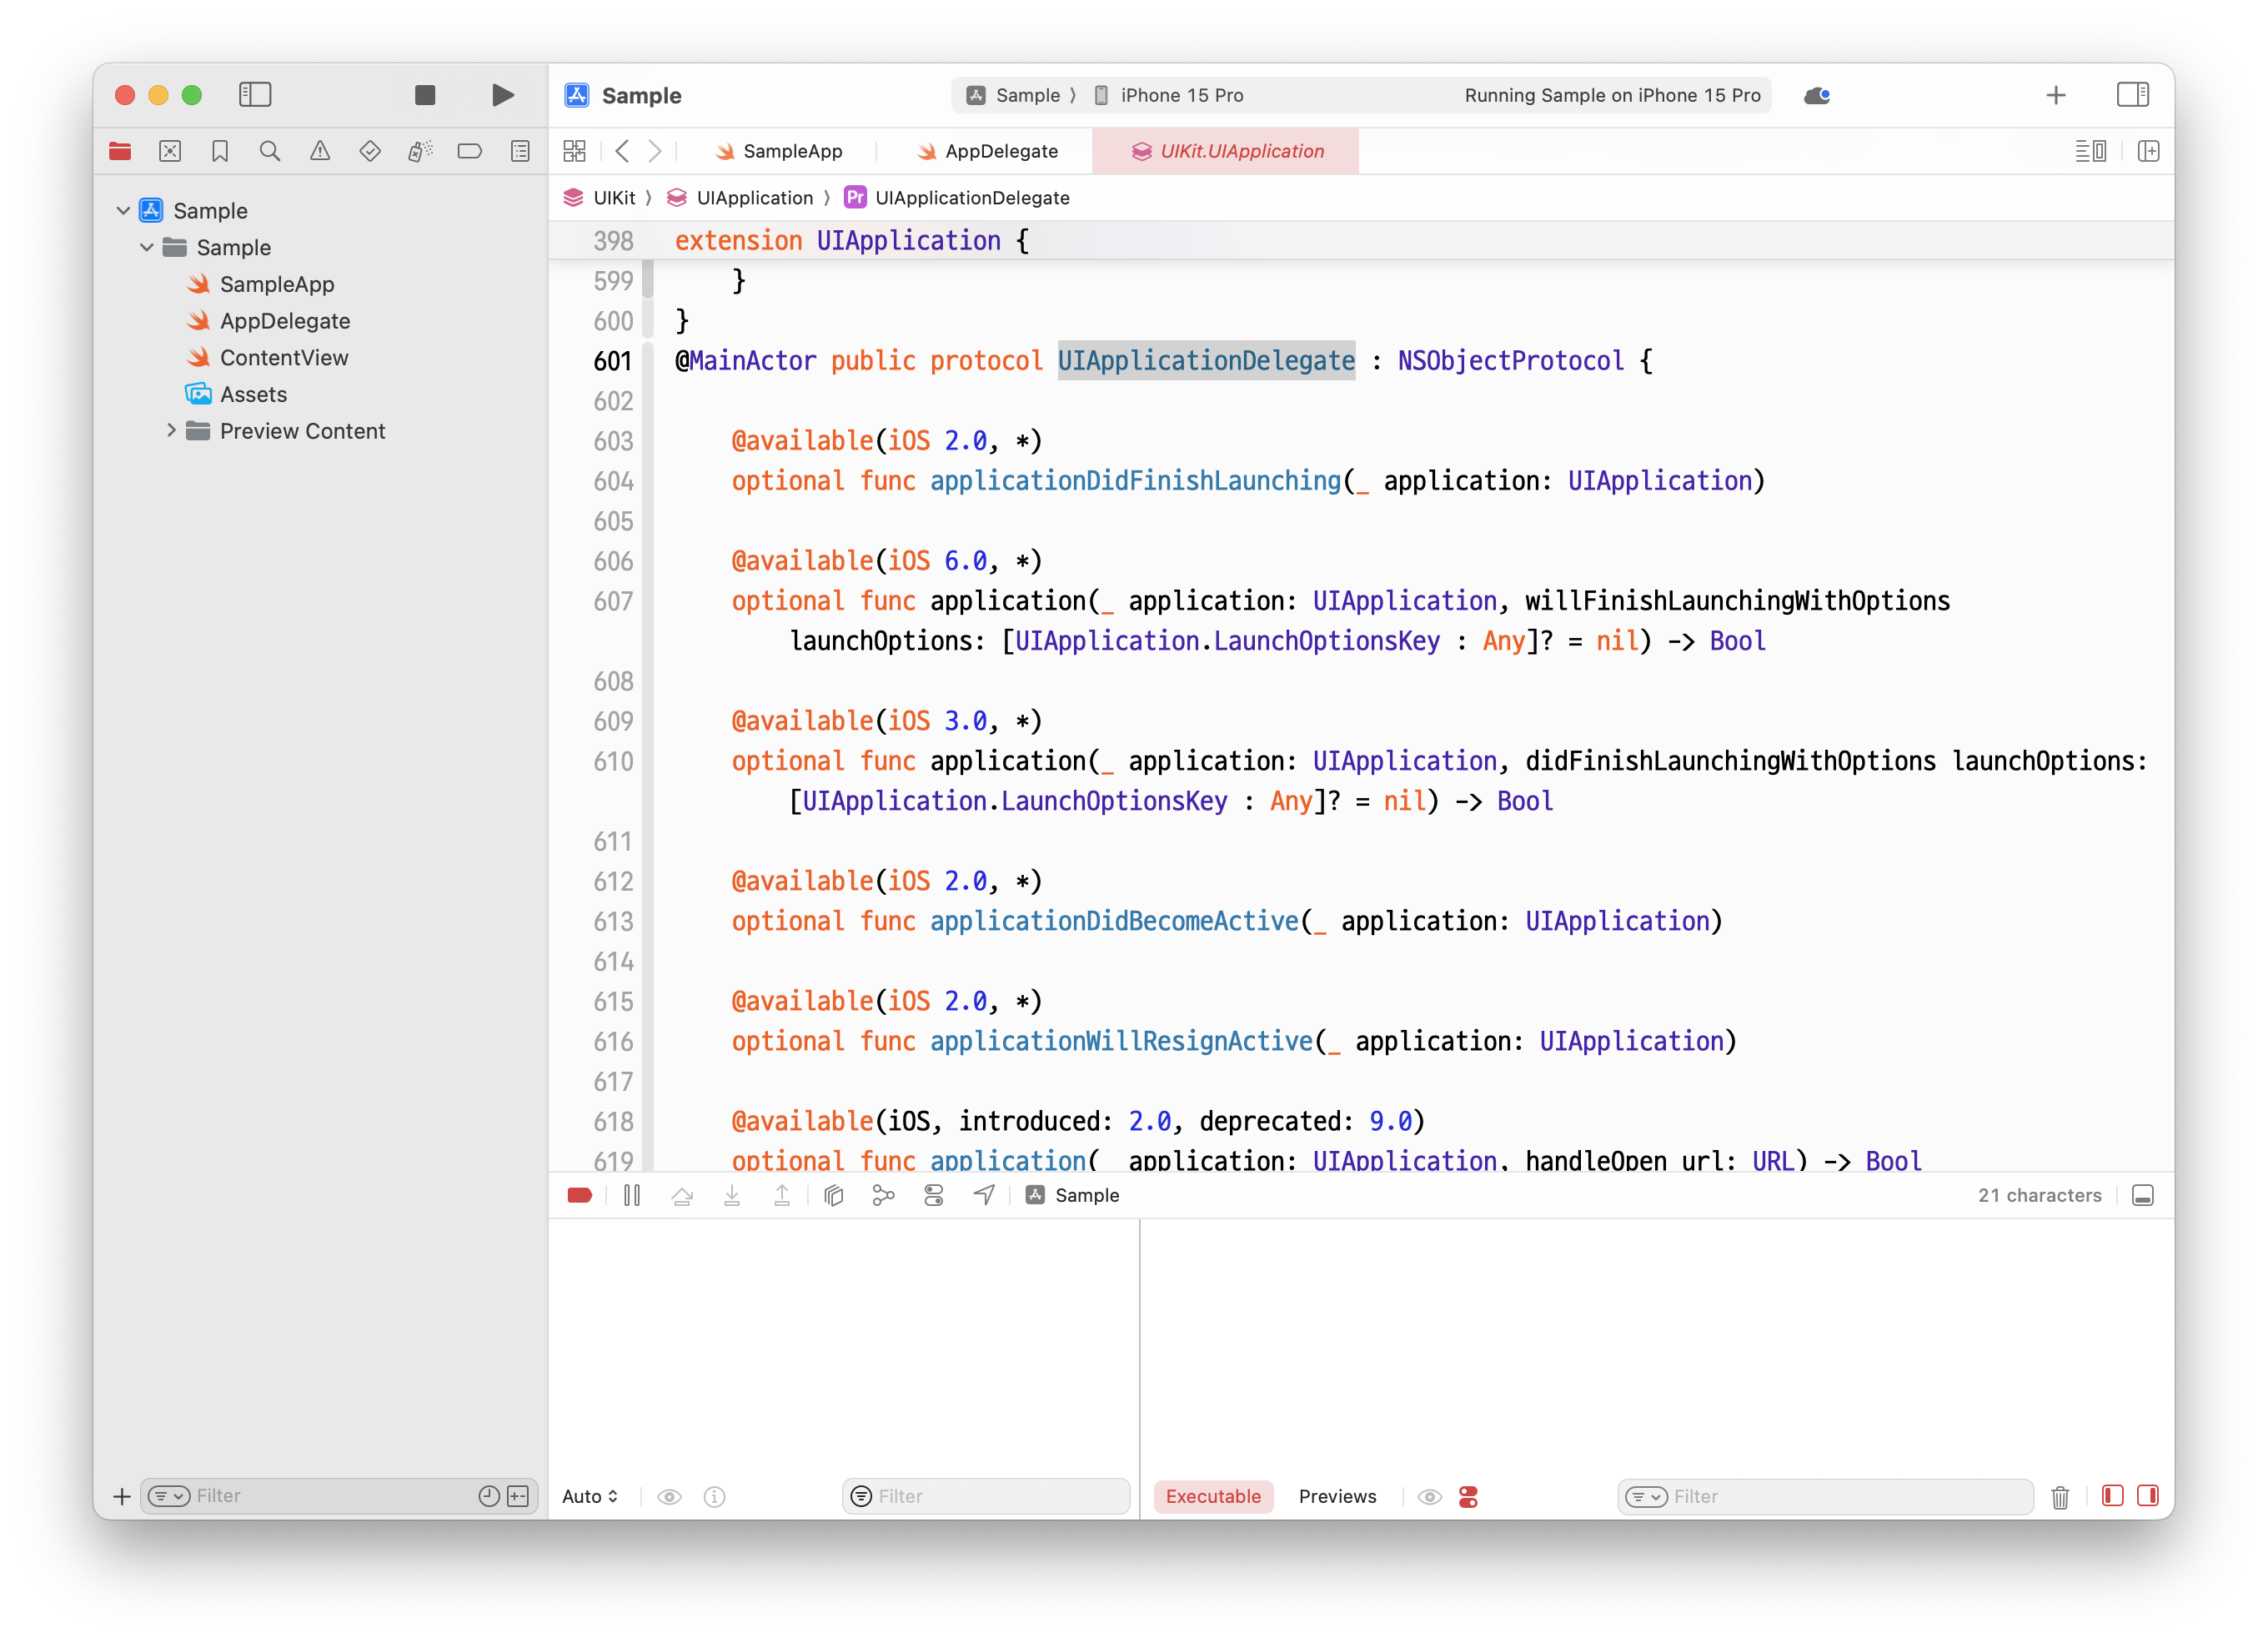
여기서 func application 을 친 뒤

아래의 코드를 넣어주자. 함수의 파라미터에도 나와있듯이 app 이 launching 을 finish 하면, 즉 앱이 켜지면 어떠한 작업을 할 수 있다.
import SwiftUI

class AppDelegate: NSObject, UIApplicationDelegate {
    func application(_ application: UIApplication, didFinishLaunchingWithOptions launchOptions: [UIApplication.LaunchOptionsKey : Any]? = nil) -> Bool {
        print("app did launch")
        return true
    }
}
프로젝트에 AppDelegate 넣기
아주 간단하다 앱 시작 부분에 @UIApplicationDelegateAdaptor(AppDelegate.self) private var appDelegate 코드를 추가해 주면 된다.
import SwiftUI

@main
struct SampleApp: App {
    @UIApplicationDelegateAdaptor(AppDelegate.self) private var appDelegate

    var body: some Scene {
        WindowGroup {
            ContentView()
        }
    }
}
실행해 보면 앱이 실행될 때 print("app did launch") 가 실행되는 것을 알 수 있다.
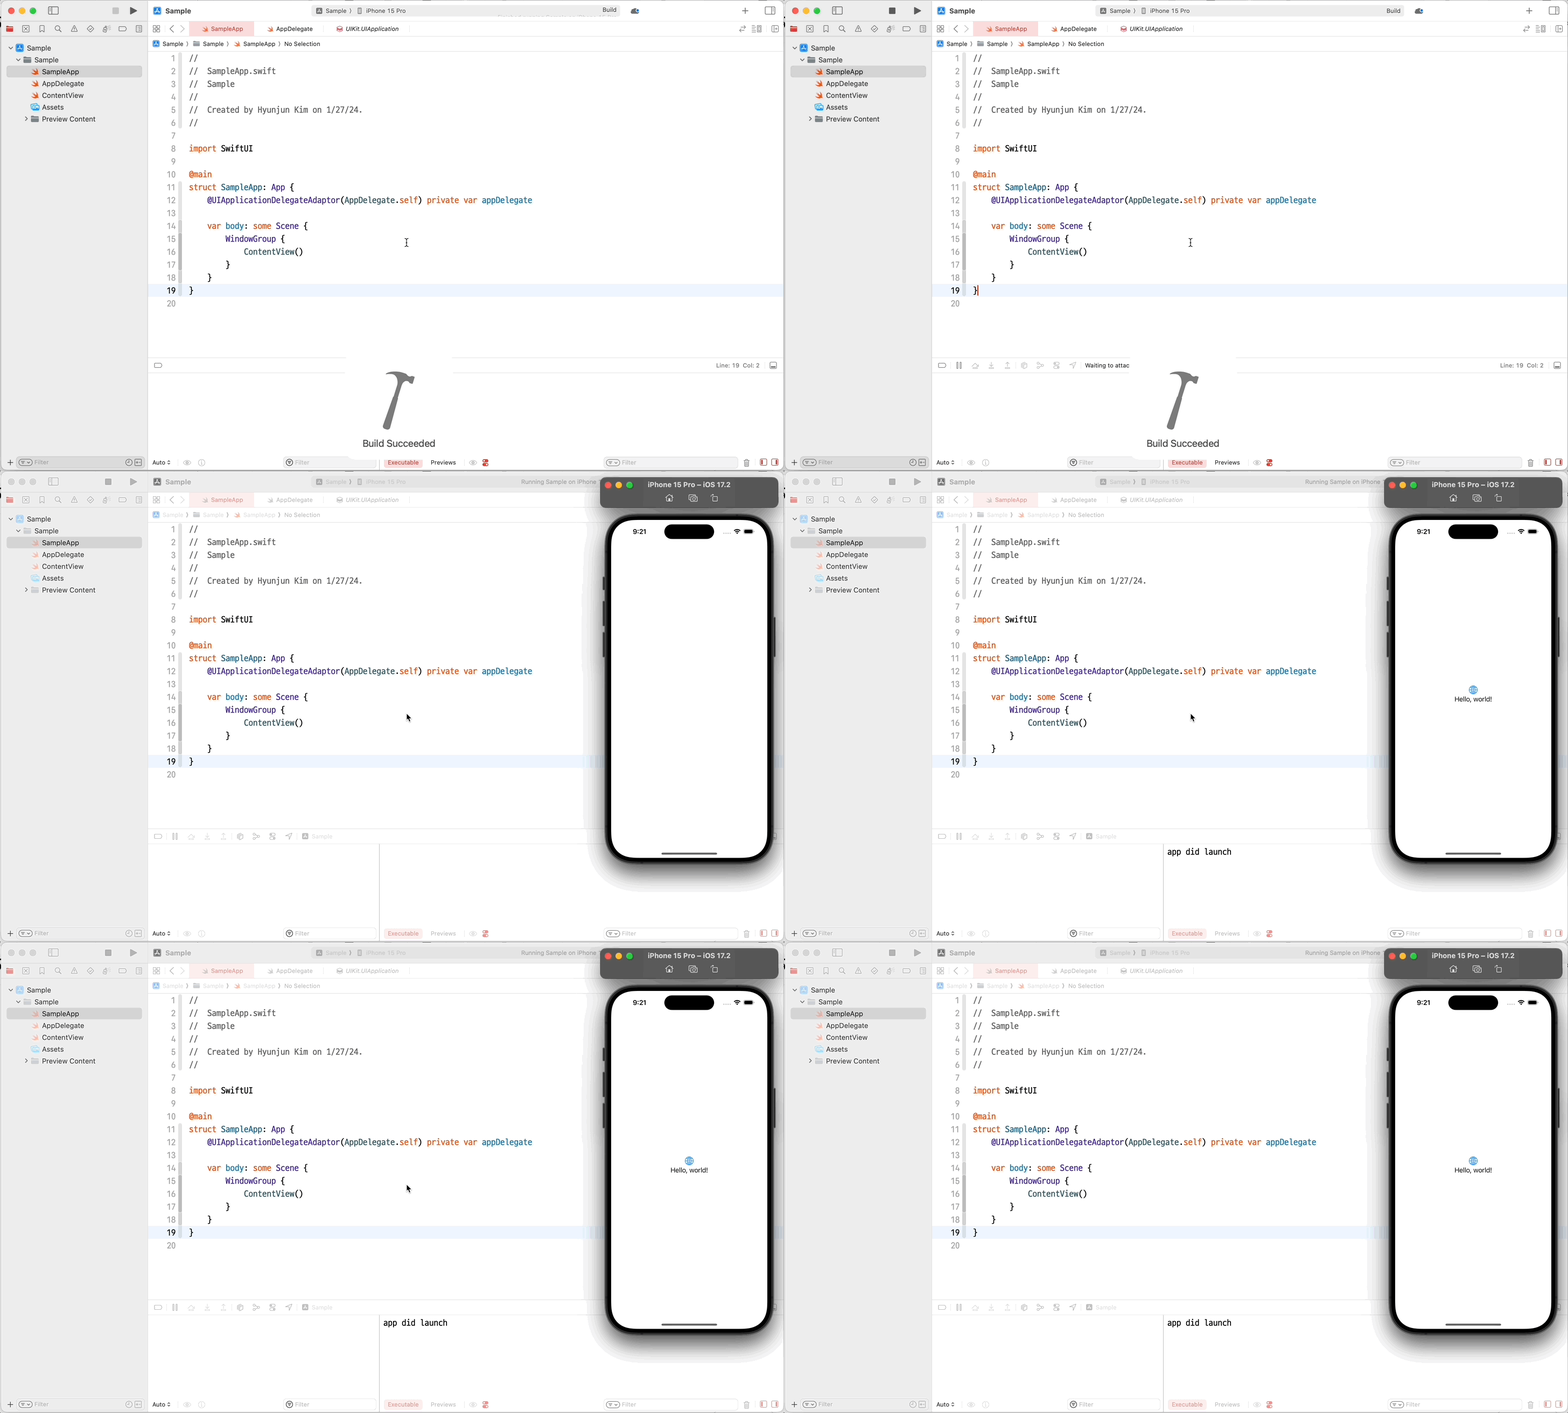
앱이 끝났을 때?
이것도 UIApplicationDelegate 중에 뭔가가 있겠지..? func applicationWillTerminate(_ application: UIApplication) { } 를 사용하면 된다!
import SwiftUI

class AppDelegate: NSObject, UIApplicationDelegate {
    func application(_ application: UIApplication, didFinishLaunchingWithOptions launchOptions: [UIApplication.LaunchOptionsKey : Any]? = nil) -> Bool {
        print("app did launch")
        return true
    }

    func applicationWillTerminate(_ application: UIApplication) {
        print("app will terminate")
    }
}
그러면 아래와 같이 앱을 껐을 때 app will terminate 라는 문구가 뜨는 것을 알 수 있다. 앱이 종료될 것입니다 라는 뜻이다.
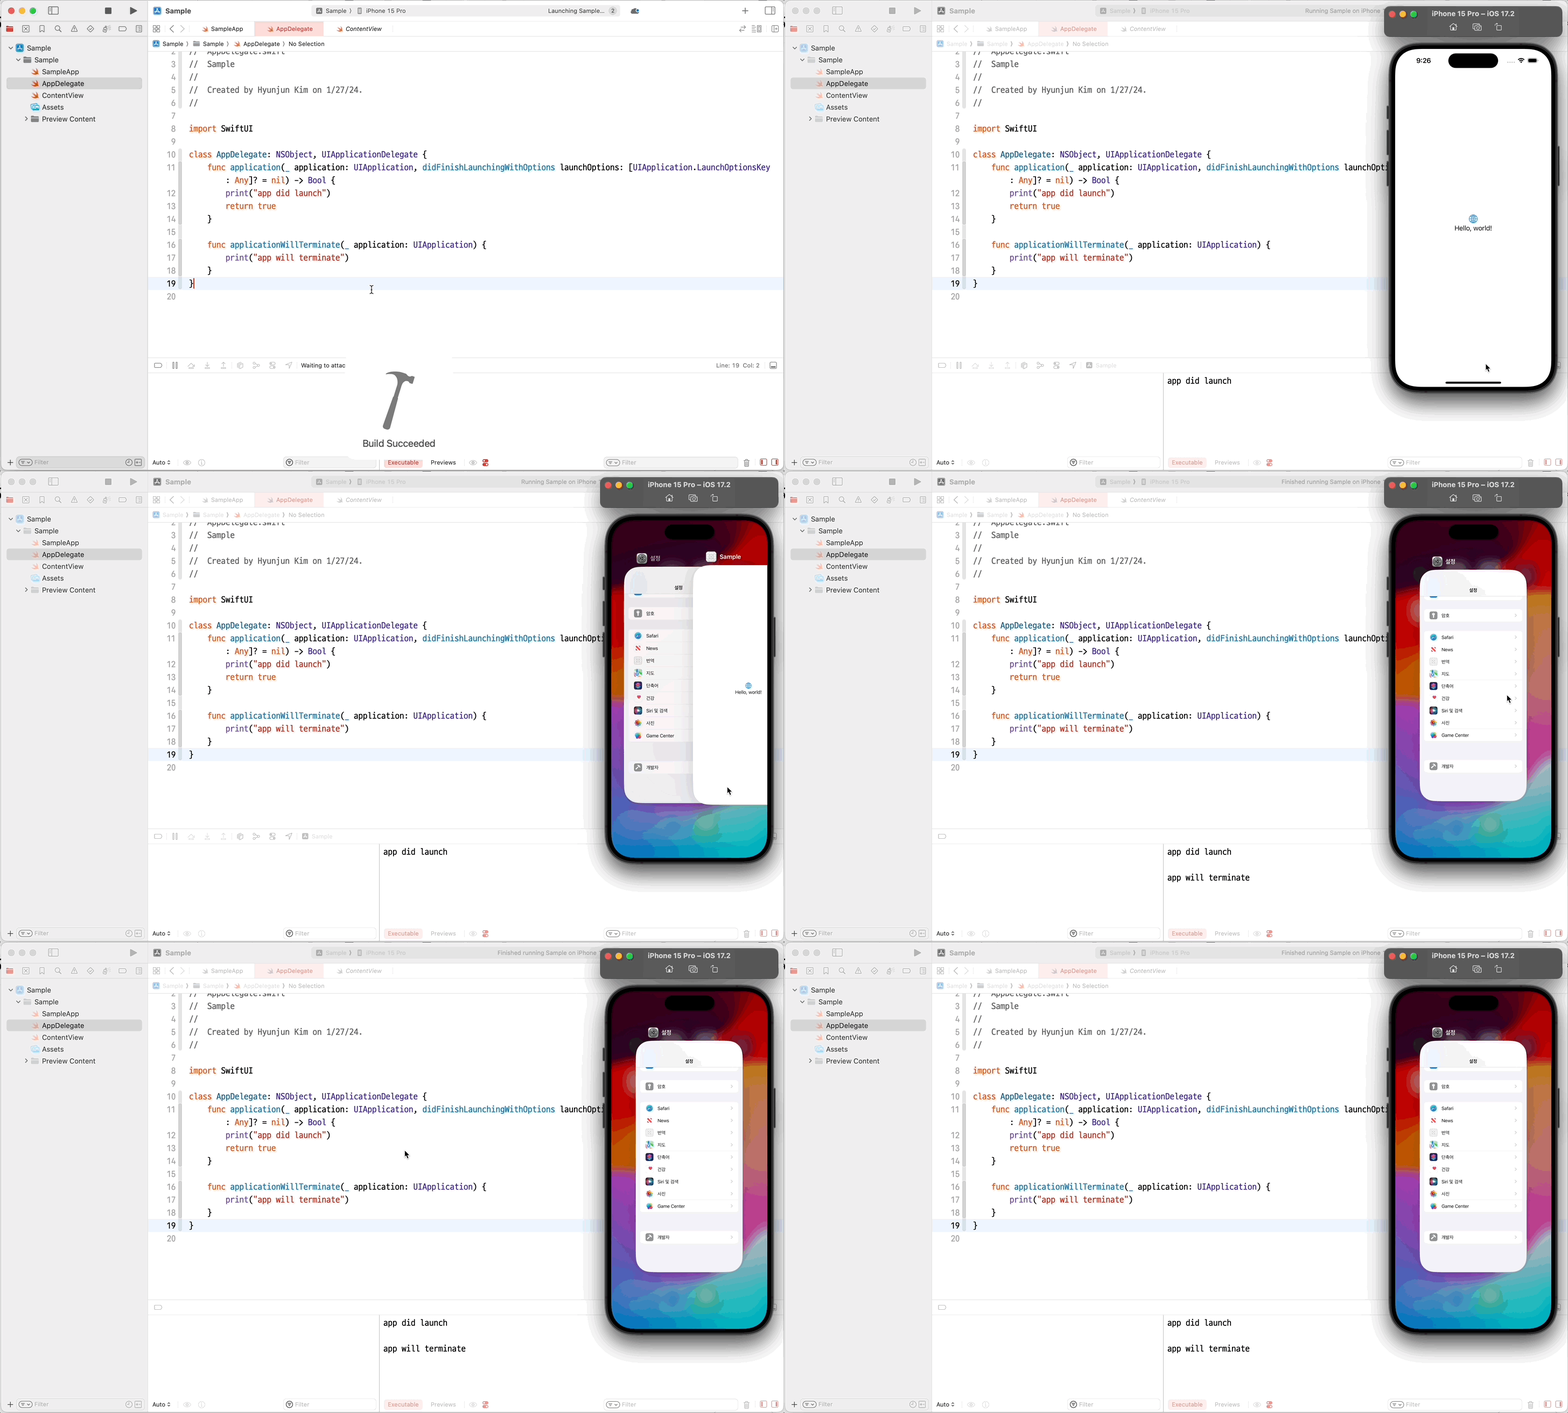
SceneDelegate 파일 생성하기
만약 좀더 디테일한 작업들을 하고싶다면...? SceneDelegate 파일을 위에 만들었던거와 똑같이 만들어주는데 이번에는 UIWindowSceneDelegate 프로토콜을 따르게 한다. 그리고 아래의 자주 쓰는 함수들을 세팅해준다. 굳이 다 넣을 필요는 없다.
import SwiftUI

class SceneDelegate: NSObject, UIWindowSceneDelegate {

    var window: UIWindow?

    func scene(_ scene: UIScene, willConnectTo session: UISceneSession, options connectionOptions: UIScene.ConnectionOptions) {
        guard let _ = (scene as? UIWindowScene) else { return }
    }

    func sceneDidDisconnect(_ scene: UIScene) {

    }

    func sceneDidBecomeActive(_ scene: UIScene) {

    }

    func sceneWillResignActive(_ scene: UIScene) {

    }

    func sceneWillEnterForeground(_ scene: UIScene) {

    }

    func sceneDidEnterBackground(_ scene: UIScene) {

    }
}
AppDelegate, SceneDelegate 연결하기
AppDelegate 클래스에 아래와 같은 코드를 넣어준다.
  func application(_ application: UIApplication, configurationForConnecting connectingSceneSession: UISceneSession, options: UIScene.ConnectionOptions) -> UISceneConfiguration {
      let sceneConfig: UISceneConfiguration = UISceneConfiguration(name: nil, sessionRole: connectingSceneSession.role)
      sceneConfig.delegateClass = SceneDelegate.self
      return sceneConfig
  }
아래와 같이 연결되었음을 한번 확인해보자.

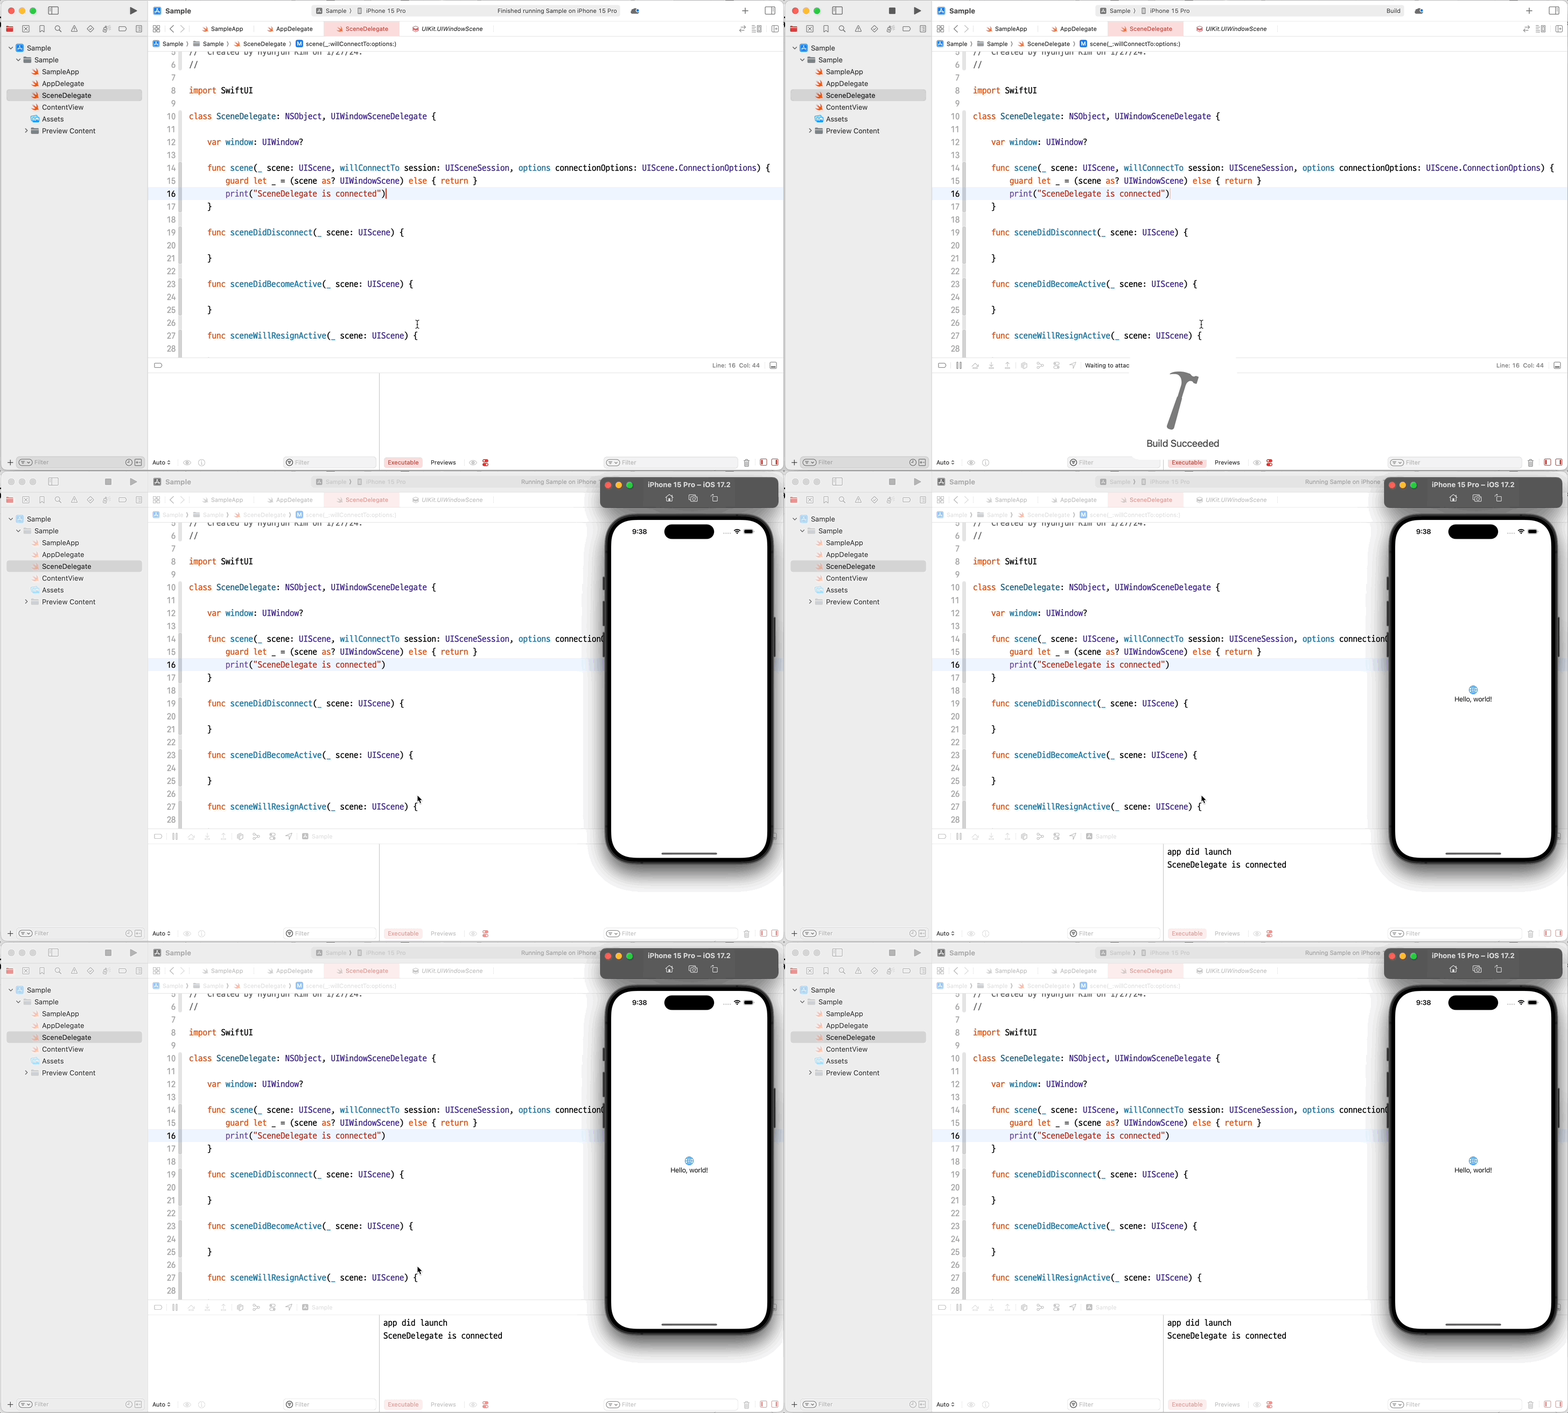
SceneDelegate 를 통해 더 디테일하게 Scene 의 상태를 통해 여러가지 작업을 수행할 수 있다!
코드
AppDelegate
import SwiftUI

class AppDelegate: NSObject, UIApplicationDelegate {

    func application(_ application: UIApplication, didFinishLaunchingWithOptions launchOptions: [UIApplication.LaunchOptionsKey : Any]? = nil) -> Bool {
        print("app did launch")
        return true
    }

    func applicationWillTerminate(_ application: UIApplication) {
        print("app will terminate")
    }

    func application(_ application: UIApplication, configurationForConnecting connectingSceneSession: UISceneSession, options: UIScene.ConnectionOptions) -> UISceneConfiguration {
        let sceneConfig: UISceneConfiguration = UISceneConfiguration(name: nil, sessionRole: connectingSceneSession.role)
        sceneConfig.delegateClass = SceneDelegate.self
        return sceneConfig
    }
}
SceneDelegate
import SwiftUI

class SceneDelegate: NSObject, UIWindowSceneDelegate {

    var window: UIWindow?

    func scene(_ scene: UIScene, willConnectTo session: UISceneSession, options connectionOptions: UIScene.ConnectionOptions) {
        guard let _ = (scene as? UIWindowScene) else { return }
        print("SceneDelegate is connected")
    }

    func sceneDidDisconnect(_ scene: UIScene) {
        print("Scene did disconnect")
    }

    func sceneDidBecomeActive(_ scene: UIScene) {
        print("Scene did become active")
    }

    func sceneWillResignActive(_ scene: UIScene) {
        print("Scene will resign active")
    }

    func sceneWillEnterForeground(_ scene: UIScene) {
        print("scene will enter foreground")
    }

    func sceneDidEnterBackground(_ scene: UIScene) {
        print("scene will enter background")
    }
}
SampleApp
import SwiftUI

@main
struct SampleApp: App {
    @UIApplicationDelegateAdaptor(AppDelegate.self) private var appDelegate

    var body: some Scene {
        WindowGroup {
            ContentView()
        }
    }
}
'→ Swift Archive' 카테고리의 다른 글
| [SwiftUI] 커스텀 달력 만들기 (1) | 2024.02.06 |
|---|---|
| [SwiftUI] TabView 이상한 현상 발견?! (0) | 2024.02.03 |
| [SwiftUI] 앱이 background 에서 다시 돌아왔을 때 알기 (0) | 2024.01.27 |
| [SwiftUI] 네트워크 연결 확인하기 (1) | 2024.01.23 |
| [SwiftUI] 커스텀 글래스모피즘 구현하기 (0) | 2024.01.10 |